Sunday, April 21, 2013

All Mixed Up: Assessing the Triple Cortex Typology

Hello all,

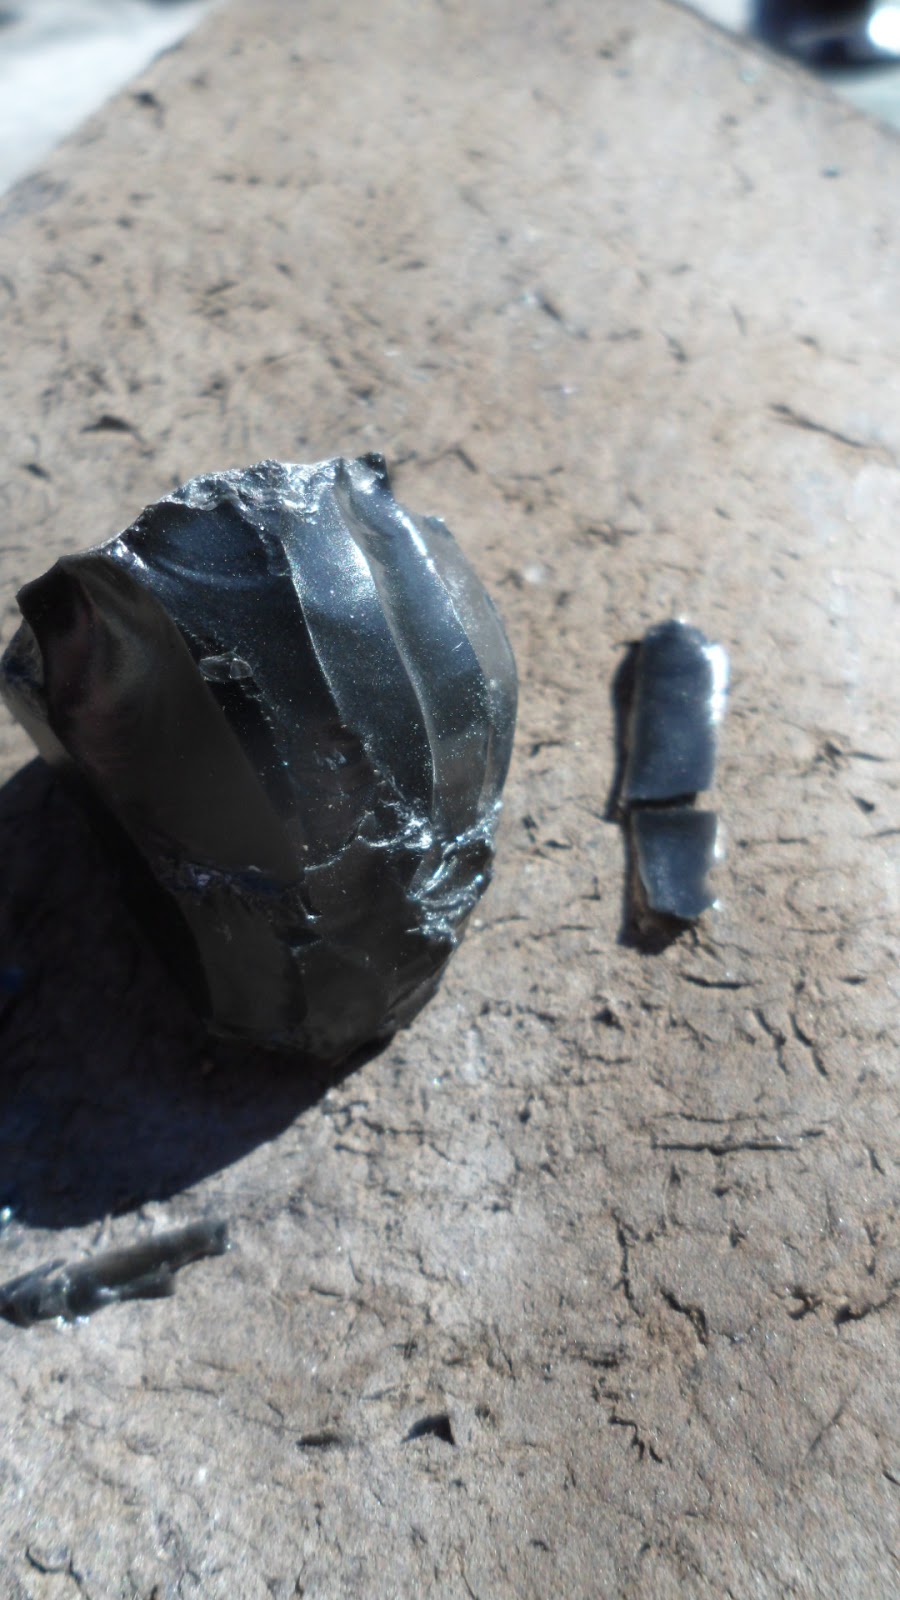
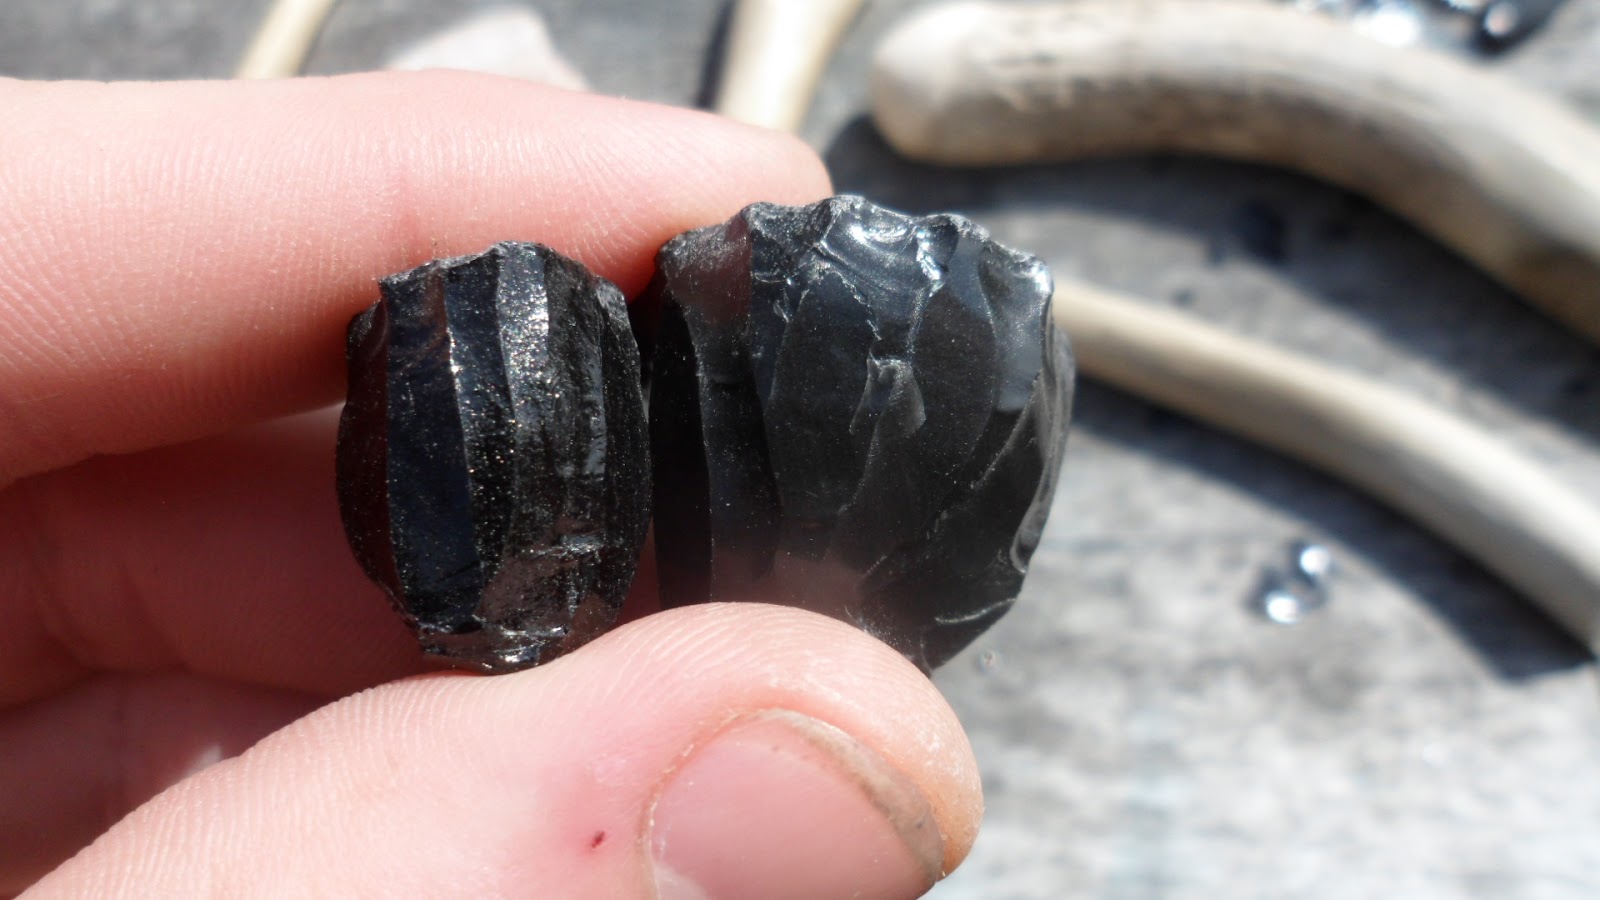
Full cortex on dorsal side of an Edwards chert spall
 See video here

I was going over a few lithic coding sheets in preparation for upcoming field projects and though I'd check a few things out while making a point for an upcoming test on the blog.  Lithic coding sheets often appear very standardized, issuing group designations based on aggregate analyses and specific attribute analyses.  In following all the steps outlined in our code sheets we become comfortable that we are approaching the collection in an appropriate and meaningful manner, and that our hard work is time well spent in illustrating prehistoric behavioral patterns.  Our education and patience often pays off and lets us discuss patterning in mobility, cost-benefit decisions and different traditions of learning and acting.

Ventral side with no cortex
But, unfortunately our methods aren't always that cut and dry.  Let's have a quick chat about the Triple Cortex Typology.  This method splits an assemblage of flakes into three categories.  primary flakes have lots of cortex on the flake surface (the weathered outside of a stone). secondary flakes have less cortex than primary flakes and tertiary flakes have no cortex and lots of flake removal scars.  This method is used to infer early, middle and late stage flaking.  Some also use it to infer distance from procurement source with varying levels of success.  At this point the lithic analysts reading this are probably thinking "He makes that sound too loose, where are the cortex percentages to separate the categories"?  Well, that's a problem isn't it?  Check out a few publications and CRM coding sheets and you will often find a lack carefully defined measurements and variable percentages to construct each of these categories.  This of course leads to unreproducible data and an inability to compare patterns between studies.  Andrefsky (2005:115-118) discusses this problem in more detail in his book "Lithics: Macroscopic Approaches to Analysis".

Scatter of platform prep flakes


So that's problem number 1, that the method, while potentially helpful is often subjective. Problem number 2 is that flakes that would appear to be primary, secondary and tertiary flakes (ie, early, middle and late stage) may all be produced at the same time.  Often small chips that we would consider to be "resharpening flakes" are created during platform preparation for larger cortical flake removals.  So, While the goal may be a single large cortical flake removal from a biface, a higher volume of smaller flakes has been created in doing so.  This pattern would perhaps lead us to classify a location as a logistical site due to a higher ratio of non-cortical to cortical flakes.  The flakes produced in this case may mask the actual intention of the stone work. 


The Test:

The mixed nature of cortex/non cortex
I decided to collect a subset of flakes made during the production of a projectile point to see for myself how different levels of cortex (to which one might infer "stage") may be created in a mixed manner, rather than the nice linear trend we often read about in texts.  This is something I had noticed before but still like to do to see the variability produced.  Sure enough, the guide flakes and platform prep flakes that must be removed prior to large cortical flake removal are smaller and have little to no cortex.  I'm always a little surprised at the mixed nature of size, shape and cortex that is removed over the course of biface thinning.  Eventually the cortical flakes taper out, although often times they pop back up again when I  start working another margin of the piece.

So...what then.  How do we asses stages of production!? Isn't that a meaningful measure to infer mobility?  Yep, I still believe that understanding how and when individuals decide to further reduce stone is important.  Careful disclosure of what percentage one calls primary and secondary flakes is essential for consistent measures and can offer valuable information regarding where people are choosing to carry out specific parts of stone tool production.  Yet I also see larger importance in attempting this maneuver in a way that accepts the complex nature of flake production, where flake morphology can rarely indicate discrete "stages", but are rather a part of a continuum where multiple morphologies may be produced in a mixed fashion.


Finished dart point


Check out the video to see what I mean.  Flakes of all different cortex measures are created well into the process.  Send me your thoughts as to how we might make better sense of this dilemma.  I have opinions too, don't worry.


For more info on the problems associated with a strict adherence to primary, secondary and tertiary flake stages and distinctions between the types check out:


 Andrefsky Jr., William. 2005. Lithics: Macroscopic Approaches to Analysis. Cambridge Manuals in Archaeology. Cambridge University Press, Cambridge.

Draper, John A and Gordon A. Lothson. 1990. Test excavations at 10NP143 and 10NP292, Lower Clearwater River, West Central Idaho. Project Report 12. Pullman:Center for Northwest Anthropology, Washington State University

Sullivan, Allen P. and Kenneth Rozen. 1985. Debitage analysis and archaeological interpretation. American Antiquity. 50: 755-79


Wednesday, April 10, 2013

Spare Time Tinkering

Hi all,

Been a little while.  For all that went, I hope the SAA meetings went well.  I had a great time and saw some great new research happening.  This is just a quick post to show what I've been working on in my spare time.  I've been playing around with the flaking sequence for serrated edges somewhat and have met with various degrees of success.  As always, there is still a ton to learn about flaking sequences for making clean serrated points.  All of these points were made with antler tools, no metal as usual.  I have gone through two antler tine pressure flakers so far.  Once the tip has been resharpened too many times you start getting into the pithy part of the antler and the tool becomes useless.  At that time it's best to recycle the antler into a knife handle.

I will be starting up a few more tests in the near future.  Anybody have some high quality basalt they can offer up?  I'm going to do a Samoan stone axe test.

Till then,   


Saturday, March 16, 2013

Bones and Blades: All Sorts of Mayhem


microblade core with detached blade
Hi all,

Check out the video HERE!


I recently had my friend Josh Lynch over to the house to throw a few atlatl darts at a rack of ribs.  He is affiliated with the Center for the Study of the First Americans, part of the Department of Anthropology here at Texas A&M University.  His research focuses on late Pleistocene/early Holocene hunter-gatherer activity along the eastern edge of the Bearing Land Bridge.  The high frequency of microblades at excavated sites suggests prehistoric hunters were using tiny blades to make composite antler/blade projectile points.  Here's why this technological choice is so cool: Stone is sharp and bone is durable...so mix the two together and you have a durable delivery system with sharp (and replaceable) cutting edges.  Sticking tiny stone blades into an antler is a fantastic way to conserve raw materials.  In the absence of abundant stone to make tools out of, pressing a few tiny blades into a sharp bone point will certainly work well.

slot awaiting pitch and blades
   
clamp the core in your hands
Think of the math for a sec, I made a biface the other day that has a total of 12.5 cm of cutting edge and weighs 9.4 grams. This point cost me 70 grams of raw material and about an hour's worth of time.  The microblade/ antler point on the other hand used a total of 10 blades with a total of 12.7 cm of usable cutting edge and weighed a whopping...wait for it...1.2 grams.  The flake core is still usable and will give plenty of blades in the future.  Blades don't take much time to produce, a few seconds per blade once the core is set up.  The antler tip is the biggest time sink, yet it is also the most durable component.  Microblades in antler seems to be a great risk reducing strategy and uses a minimal amount of stone.  If you're ever in a pinch and have a little bit of stone and an antler, i suggest trying this set up first.  Unlike other blade core stuff, you don't need a chest crutch or an antler punch for indirect percussion with microblade production.  Hand held pressure flaking seemed to work just fine.

On to the Test!

We set the blades and tested the dart against two different arrow points and a large stemmed atlatl point made on Edwards Chert.  The atlatl can handle larger points than the bow so I was pretty excited to see what these bruisers would do.  I was actually pretty surprised at what the bow did too.

I'm always a little astounded at what a sharp rock flying fast will do to things.

Results

The arrow points broke bone, unlike that little point that stuck into the bone a few tests ago.  The side notched point cracked through a rib and broke in half and the obsidian point came off in the hay after shattering on a rib.  It became increasingly clear how clever the antler/blade set up is.  These points could go all day.  The bone and stone combo is both serviceable and durable, two things that play a large part in long-term success rates.

The thing just looks mean too, like something you'd see sketched on a napkin after Rambo had Chuck Norris and Edward Scissor Hands over for arm wrestling and tree kicking practice.  Still waiting on my invite...my phone must have been off. 

The microblade point melted through the meat but ran into problems when in contact with the ribs.  Not like a few blades coming out is a big problem, they would have popped out eight inches into the critter.

microblade wound through ribs

you bring the meat, I'll kill a fence
The Edwards Chert point needs special mention.  This point gets the workhorse award.  The point just wouldn't break, and yeah we tried to kill it dead.  I launched it into the fence and all I got was a chipped tip.  The Edwards point made gigantic holes, ca. 4.5 cm (about 2 in) and crunched up bone like it was for breakfast.  I'd be happy to have this point along for a hunt.

Slot cut into rib with atlatl dart


The Pachuca knife made a cameo appearance and worked great.  I was able to cut through the entire rack in two slices, not bad.  The cut marks on bone made by the obsidian knife were pretty neat too.  We find these in archaeological trash deposits (middens) sometimes.

All in all a fun test.  The folks in Alaska were really on to something out there.  The combination of strength and sharpness that the antler/blade set up offers is a pretty novel approach to saving raw material.  This technological choice keeps your arsenal light and easy to maintain.  The arrows did well.  The normal technological relationship still stands where arrow points a quicker to make but break faster than bone points.

cut marks from Pachuca knife

finally broke the hafting element


impact fracture after bone crunching hit

I kind of want to try a weird technology, should we make and shoot those cool Paleoindian crescents?  Were they even projectiles?  Somebody chime in on that.


Later.  

Tuesday, March 12, 2013

Atlatl Teaser

Hi all,

Been a while putting this all together but here's a little about what's coming next!

Microblade core for atlatl dart

Finished dart ready to go

Edwards Chert impact damage on pork rib. 45 lb recurve bow

Large chert point on atlatl

atlatl chert point damage on pork rib

San Pedro on obsidian from the Malad source

What is the fastest one can make two functional hafted points?...fast if you don't mind looks

hunting arrows for East TX round 2
Take care and check back soon!

Friday, February 22, 2013

Archaeology Test Kitchen's Turkey Surprise!

Hi all,

Click here for the video

Early attempts on left and later attempts on right
Here are the results of the antler inset with blades versus the obsidian Bonito Notched point.  I went to the market to purchase the most meat for the least price, turned out to be a slab of turkey breast that day.  So with target in hand I needed to set up a few more things.  I wanted to start assessing blood loss is some way or another so I rigged up a styrofoam cooler with water and stuck the turkey to that.  It's all still in R&D phase right now.  If you have any suggestions for mimicking blood pressure and hide tension send them my way and I'll make a mock up.

Righto! on to the test...

As usual I shot a cane arrow shaft (from last time) fletched with turkey feathers from a 45 lb recurve bow.  I used one Bonito point hafted to a foreshaft with pine pitch and deer sinew and one composite antler and blade point.

This is going to be awesome
A little about setting blades into antler.  It's not as easy as it looks in the archaeological illustrations.  You'll find that a lot of archaeological illustrations that intend to describe production chains are over simplified to such a degree that they are almost incorrect.  Perhaps this comes about as authors adapt images for their own papers and mess up the nuances.  In this case I needed a lot more pine pitch and the grooves needed to be way deeper than I originally imagined.
 

Isolated platforms over dorsal ridges
Additionally, those tiny little blades put up a fight and don't like to stay in the pitch.  I ended up roughing up the basal edge of the flakes to give more surface area for the pitch to adhere to.  Set them deep and use a healthy dose of pitch.  I found it helped to heat the pitch, set the blade, then reheat the blade to get it in further.


Regarding the microblades, uniformity is nice but by no means essential.  Now when I imply that a little variability is ok, we're still talking in millimeters.  I find that the most critical measure to control is flake thickness, as in the amount of space the blade needs between the edges of the slot you've cut.  I used an antler punch with indirect percussion at first but found the technique to make thicker blades than I needed.  I'll need to get better at that technique as I imagine it is totally possible to mass produce fantastically uniform flakes with this method.  Pressure flaking actually produced the thinnest, most uniform flakes in this test.  Platform preparation is key.  set high-angle, isolated platforms directly over your ridges.  Remember, the further back you place your pressure flaker the thicker the flake will be so keep things close to the edge of the core.  I also found it helpful to score a little notch on either side of the isolated platform with a chert flake.  A little cut on either side makes it easier to initiate flake detachment.  Another trick I've seen is to grind the entire top of the core on sandstone to break up the surface tension.  Doing this kept a uniform platform angle and actually made flake removal much easier. 

So how did it all work?
Composite left, Bonito right

Well...the Bonito point flew great and made lenticular holes in the meat.  I was able to make upwards of six successful hits before the point snapped.  The blades had to be replaced after every shot, some of which I dug out and refitted.  The Bonito point penetrated further than the composite tip, most likely due to lower friction as opposed to the massive surface area and resultant drag of composite weapons.  The composite point had issues with blades popping out but created massive tissue damage when things worked well.  The composite point created wound paths around 3x larger than the bifacial Bonito point, yet lost speed quicker once in the tissue.  So it's a trade off, massive tissue damage for shallower or a longer wound path with less trauma.  Anyone know of any studies that formulate some sort of tissue damage index? like surface area cut/distance traveled?

Sinew held but something had to give.

All in all an informative preliminary test of wound depth versus surface area damaged between composite and bifacial projectiles.  Hopefully we can do a test with actual numbers soon.  This will all be used to make a much larger composite projectile for use in an atlatl dart thrower, just imagine what that thing is going to do!


COMING UP NEXT ON GETTING TO THE POINT:

-Research Spotlight with Joshua Lynch - Composite antler/microblade atlatl points

-Archaeology Test Kitchen's Witches Brew

  Thanks for stopping by!


Thursday, February 21, 2013

Gearing up for the Turkey Test!

Hi all,

We're back with a quick post about replicating a Bonito Side Notched Point for the next meat test (check for that soon...as in tomorrow).  I've decided to lump all of the tests where I demolish meats under the heading "Archaeology Test Kitchen", tell ya friends.  I'll post the newest ATK video, pictures and text tomorrow evening.  These things take a little bit of preparation so let's see a few things that went into tomorrow's Archaeology Test Kitchen bonanza.  I will be starting a new string of post under the heading "Research Spotlight" where I get with friends and colleagues to test the nuances of the technology that they research.

I'll be making composite antler/microblade atlatl projectiles for a test coming up soon and figured I should get a little practice in.  I also wanted to test the damage created by microblade points against that of a normal old biface so we could see some of the trade offs/benefits/weaknesses attached to each.  This gave us a test to see tissue damage and breakage rates between the two very different approaches to finding dinner.

For a bit of fun I decided to copy the morphology and flaking pattern of a Bonito Notched point (ca. A.D. 950-1150).  These are simple little leaf-shaped points that were made by folks in and around Chaco Canyon, NM.  The point type is named after Pueblo Bonito where around 80 composite arrows armed with this shape were recovered in the early years of excavation.  I'm excited to go back there this coming summer.
Up above Pueblo Bonito


I selected a simple flake that I made while thinning another point a while back.  Pueblo type points were made on biface thinning flakes all the time and it's quite common to see a little of the original flake scar on finished points.  A quick brushing along the margins with sandstone strengthens the working edge and supplies the first rough outline.  Here you're just getting an angle so you can start your first little flake pass.  Next I took a few small overpass flakes across the bulb of percussion left from the original flake removal.  It wasn't a big task, antler tools typically leave relatively diffuse bulb under the platform.  So you don't get a curved point you need to tailor the distal end of the flake back to keep things nice and flat.  A curved point will snap in a heartbeat and works about as well as a flying spork.


A few flake passes later and we have our finished preform.  Notching on these points wasn't too fancy, just simple shallow notched coming in from the side.  Oh! and one last thing, you'll find that a lot of folks oriented the preform so that the base of the point would be along the distal end of the original flake.  This means that they used the thinnest part of the original flake for the hafting element, why make a job harder!

The point worked out well and I matched the original illustration in a decent manner.  The weapon flew great too...more on that coming soon!


Also, here's a quick look at how the microblade stuff turned out.  I did a few things right, a few things wrong and learned a ton.  The point in the image has been inset with "microliths", tiny little triangular-shaped blades.  The actual microblades are to the side of the point and ended up being absolutely brutal. 

COMING UP NEXT ON GETTING TO THE POINT!

Archaeology Test Kitchen's Turkey Surprise!