Friday, February 22, 2013

Archaeology Test Kitchen's Turkey Surprise!

Hi all,

Click here for the video

Early attempts on left and later attempts on right
Here are the results of the antler inset with blades versus the obsidian Bonito Notched point.  I went to the market to purchase the most meat for the least price, turned out to be a slab of turkey breast that day.  So with target in hand I needed to set up a few more things.  I wanted to start assessing blood loss is some way or another so I rigged up a styrofoam cooler with water and stuck the turkey to that.  It's all still in R&D phase right now.  If you have any suggestions for mimicking blood pressure and hide tension send them my way and I'll make a mock up.

Righto! on to the test...

As usual I shot a cane arrow shaft (from last time) fletched with turkey feathers from a 45 lb recurve bow.  I used one Bonito point hafted to a foreshaft with pine pitch and deer sinew and one composite antler and blade point.

This is going to be awesome
A little about setting blades into antler.  It's not as easy as it looks in the archaeological illustrations.  You'll find that a lot of archaeological illustrations that intend to describe production chains are over simplified to such a degree that they are almost incorrect.  Perhaps this comes about as authors adapt images for their own papers and mess up the nuances.  In this case I needed a lot more pine pitch and the grooves needed to be way deeper than I originally imagined.
 

Isolated platforms over dorsal ridges
Additionally, those tiny little blades put up a fight and don't like to stay in the pitch.  I ended up roughing up the basal edge of the flakes to give more surface area for the pitch to adhere to.  Set them deep and use a healthy dose of pitch.  I found it helped to heat the pitch, set the blade, then reheat the blade to get it in further.


Regarding the microblades, uniformity is nice but by no means essential.  Now when I imply that a little variability is ok, we're still talking in millimeters.  I find that the most critical measure to control is flake thickness, as in the amount of space the blade needs between the edges of the slot you've cut.  I used an antler punch with indirect percussion at first but found the technique to make thicker blades than I needed.  I'll need to get better at that technique as I imagine it is totally possible to mass produce fantastically uniform flakes with this method.  Pressure flaking actually produced the thinnest, most uniform flakes in this test.  Platform preparation is key.  set high-angle, isolated platforms directly over your ridges.  Remember, the further back you place your pressure flaker the thicker the flake will be so keep things close to the edge of the core.  I also found it helpful to score a little notch on either side of the isolated platform with a chert flake.  A little cut on either side makes it easier to initiate flake detachment.  Another trick I've seen is to grind the entire top of the core on sandstone to break up the surface tension.  Doing this kept a uniform platform angle and actually made flake removal much easier. 

So how did it all work?
Composite left, Bonito right

Well...the Bonito point flew great and made lenticular holes in the meat.  I was able to make upwards of six successful hits before the point snapped.  The blades had to be replaced after every shot, some of which I dug out and refitted.  The Bonito point penetrated further than the composite tip, most likely due to lower friction as opposed to the massive surface area and resultant drag of composite weapons.  The composite point had issues with blades popping out but created massive tissue damage when things worked well.  The composite point created wound paths around 3x larger than the bifacial Bonito point, yet lost speed quicker once in the tissue.  So it's a trade off, massive tissue damage for shallower or a longer wound path with less trauma.  Anyone know of any studies that formulate some sort of tissue damage index? like surface area cut/distance traveled?

Sinew held but something had to give.

All in all an informative preliminary test of wound depth versus surface area damaged between composite and bifacial projectiles.  Hopefully we can do a test with actual numbers soon.  This will all be used to make a much larger composite projectile for use in an atlatl dart thrower, just imagine what that thing is going to do!


COMING UP NEXT ON GETTING TO THE POINT:

-Research Spotlight with Joshua Lynch - Composite antler/microblade atlatl points

-Archaeology Test Kitchen's Witches Brew

  Thanks for stopping by!


Thursday, February 21, 2013

Gearing up for the Turkey Test!

Hi all,

We're back with a quick post about replicating a Bonito Side Notched Point for the next meat test (check for that soon...as in tomorrow).  I've decided to lump all of the tests where I demolish meats under the heading "Archaeology Test Kitchen", tell ya friends.  I'll post the newest ATK video, pictures and text tomorrow evening.  These things take a little bit of preparation so let's see a few things that went into tomorrow's Archaeology Test Kitchen bonanza.  I will be starting a new string of post under the heading "Research Spotlight" where I get with friends and colleagues to test the nuances of the technology that they research.

I'll be making composite antler/microblade atlatl projectiles for a test coming up soon and figured I should get a little practice in.  I also wanted to test the damage created by microblade points against that of a normal old biface so we could see some of the trade offs/benefits/weaknesses attached to each.  This gave us a test to see tissue damage and breakage rates between the two very different approaches to finding dinner.

For a bit of fun I decided to copy the morphology and flaking pattern of a Bonito Notched point (ca. A.D. 950-1150).  These are simple little leaf-shaped points that were made by folks in and around Chaco Canyon, NM.  The point type is named after Pueblo Bonito where around 80 composite arrows armed with this shape were recovered in the early years of excavation.  I'm excited to go back there this coming summer.
Up above Pueblo Bonito


I selected a simple flake that I made while thinning another point a while back.  Pueblo type points were made on biface thinning flakes all the time and it's quite common to see a little of the original flake scar on finished points.  A quick brushing along the margins with sandstone strengthens the working edge and supplies the first rough outline.  Here you're just getting an angle so you can start your first little flake pass.  Next I took a few small overpass flakes across the bulb of percussion left from the original flake removal.  It wasn't a big task, antler tools typically leave relatively diffuse bulb under the platform.  So you don't get a curved point you need to tailor the distal end of the flake back to keep things nice and flat.  A curved point will snap in a heartbeat and works about as well as a flying spork.


A few flake passes later and we have our finished preform.  Notching on these points wasn't too fancy, just simple shallow notched coming in from the side.  Oh! and one last thing, you'll find that a lot of folks oriented the preform so that the base of the point would be along the distal end of the original flake.  This means that they used the thinnest part of the original flake for the hafting element, why make a job harder!

The point worked out well and I matched the original illustration in a decent manner.  The weapon flew great too...more on that coming soon!


Also, here's a quick look at how the microblade stuff turned out.  I did a few things right, a few things wrong and learned a ton.  The point in the image has been inset with "microliths", tiny little triangular-shaped blades.  The actual microblades are to the side of the point and ended up being absolutely brutal. 

COMING UP NEXT ON GETTING TO THE POINT!

Archaeology Test Kitchen's Turkey Surprise!


Monday, February 11, 2013

Battle of the Barbs: Foreshafts of Doom

Hello all,

Prelims took up some time, it's good to be back behind the bow.  Check out the video HERE!

I've been wanting to make an arrow from a stand of cane in the back yard for a while now.  It turns out to be a little challenging but well worth the time.  I'll do a post about making those later on.  Since it's hollow, cane allows for the use of foreshafts, meaning the arrow has two parts, a mainshaft and a foreshaft.  This composite weapon has a few distinct advantages over one-piece or "self arrows".
Bruiser of a Snaketown point

Here's how it rolls:  One can reduce the amount of transported weight by carrying a only a couple of arrow shafts and a whole clutch of foreshafts.  The foreshafts can be quickly replaced when you break a point or after the main shaft falls out of a hit animal.  This idea of interchangeable parts is great! instead of carrying a ton of arrows around you just carry the tips and change them out as needed.  And you know what? A little secret...foreshafts work great as knives too.  This type of technology has all the traits of an item you want with you: light weight, replaceable, multipurpose, deadly.


  On to the test!

I had some raccoon meat left in the freezer from a hunt with my brother (congrats!) a while back.  While really good in stew, no kidding, the meat had freezer burn and was put to use as a test target.  I like to use meat with bones in it as it presents a realistic test of projectile/animal interaction.  I harp on this all the time, but it remains true, prehistoric weapon systems were constructed to kill stuff, not to be found by archaeologists and drooled over. As such they were tailored to break bone, lacerate, and kill through blood loss. Awesome...I know...I know.  Shooting through bone and sinew gives a realistic idea of breakage ratios and projectile performance.

I made two cane arrows that ran the spectrum of size and technology.  The larger shaft was fitted with interchangeable foreshafts and the smaller arrow had a single point lashed with sinew and pitch.  This would give me an idea of how the two types stack up.
Cane arrow with wooden nock and sinew to prevent splitting


Dacite Snaketown


I made two versions of Snaketown points, specifically a Salt River Indented Base and a Snaketown Trangular that I took a little liberty with and gave a stem to.  These point types come from the Santa Cruze phase of the Hohokam and date to ca. A.D.850-1000 in Central Arizona.  Some authors have proposed that these ornate points were the work of specialists engaged in competition for prestige through a display of skill.  I can get on board with that to some degree.  Read up on Hohokam culture, their ball courts are pretty cool.
Sobaipuri no sinew
Buck Taylor serrated with sinew


I also made another Pueblo Side Notch of the Buck Taylor variety (ca. A.D. 1400-1800 Central AZ) and a Sobaipuri point (A.D. 1500-1800 Central AZ).  All points were secured with pine pitch and one of each point type was fastened with deer sinew.  The raccoon meat was shot with the composite cane arrow from a distance of 15 yards with a 45lb recurve bow.  I used a new type of fletching call flu-flu fletching (odd, yes) that makes a cool zip sound as it flies.  The big fletches are actually super stable in flight.

Results  

Just look at that! Buck Taylor = meatsplosion
All but the larger Snaketown point broke.
The Sobaipuri point was only attached with pine pitch and as such failed miserably.  I had high hopes but it just didn't do the trick for me.  The Buck Taylor serrated did its job and gets a gold star.  These have become my go-to point for hunting along with the Walnut Creek.  The Snaketown points stood up well and made some unique damage .


 the Snaketown makes a combo slice/round hole as it rotates, epic!


Oh, the arrow with a the single hafted point broke on the first shot and was benched.  The composite arrow was used for another 30 shots or so and tips were easily exchanged. Composite wins, hands down. 

A Final Word 

As opposed to the slice-like cuts that your run of the mill lenticular points make, the Snaketowns powered through bone and made star-shaped holes.  I was surprised at the tenacity these points have.  As the barbs rotate they cut a big rounded hole, somewhat like a bullet wound.  The Buck Taylor made cleaner cuts until it exploded on a bone and caused some rather brutal trauma, check the end of the video for that, yikes!

All in all a fun test that gave some interesting results.  The diamond cross-section with barbs cut star-shaped holes and punched through bone.  The lenticular cross-sectioned Buck Taylor made knife-like wounds and then caused the most damage of them all in the end.  I'm not sure what to make of that little Buck Taylor, it gets the gold medal for overall tissue damage while the Snaketowns get the prize for big bone-crunching holes.

And I didn't even hit a deck chair!

I'm taking suggestions from ya'll...what should we do next?  

 I'm thinking composite points, yeah, two points notched and stuck together to make a broadhead


Thursday, January 31, 2013

Pueblo Side-Notch Vs. Meatbeast


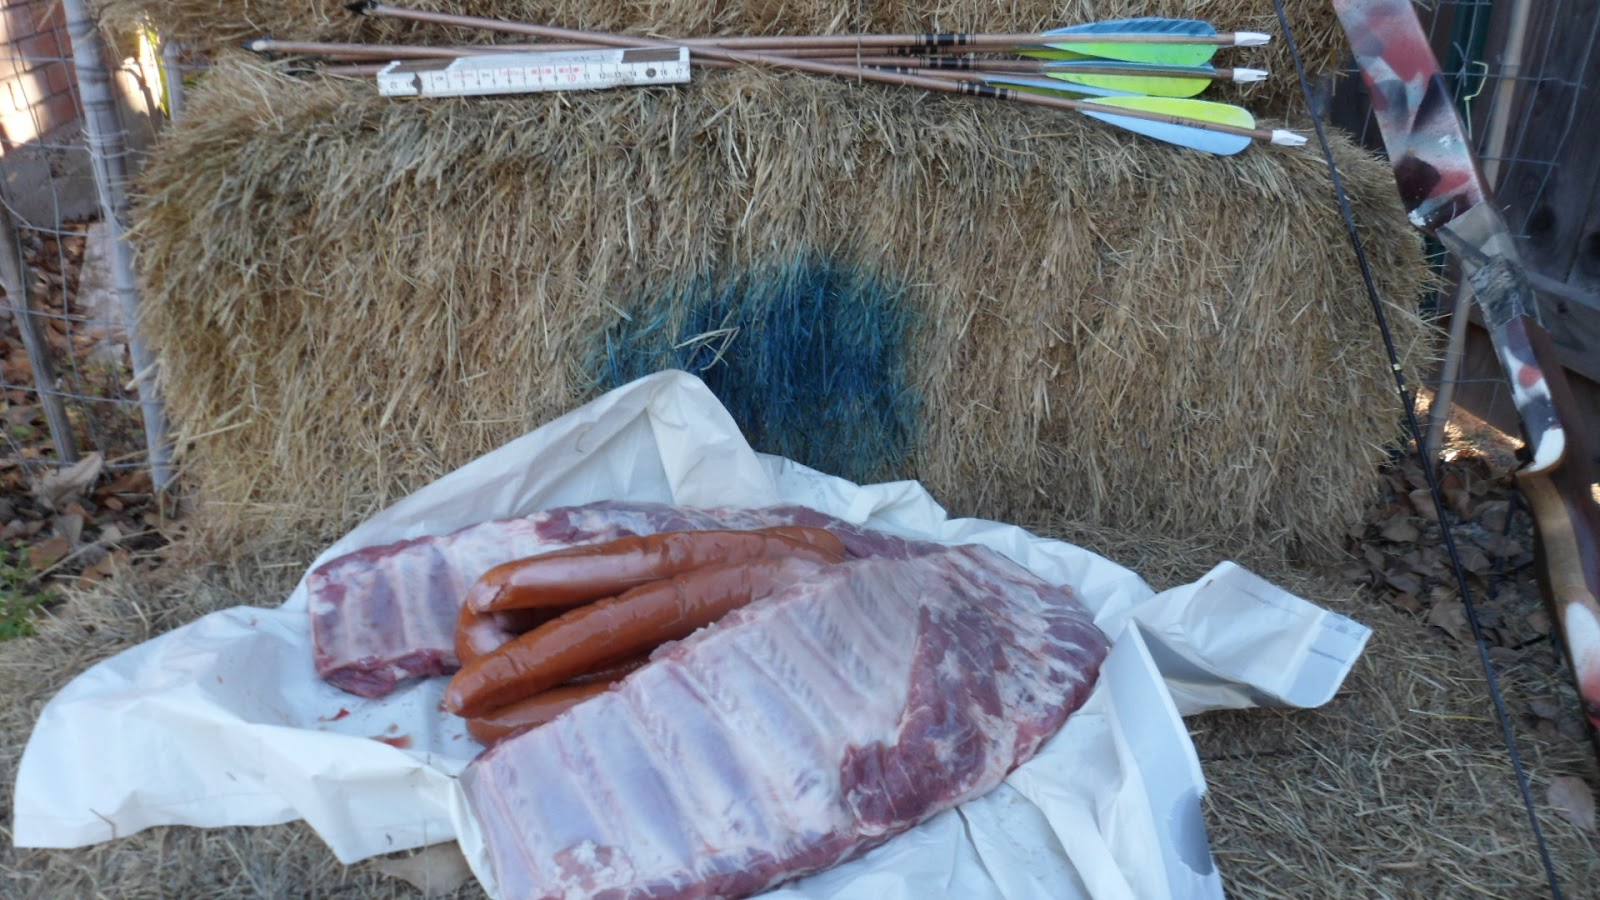
Here's what we have to work with
This project took a little while to put together but it's finally finished and I'm pretty happy with it.  Remember when your mother would spend hours cooking a meal and you would slam it down your face in 3 seconds?  Same idea here...except I'm not your mom.

I've also uploaded a super low-fi video 

Walnut Canyon, PSN, PSN, Bonito Notched, PSN


The idea behind this one is to test those little points that were used so frequently by people living in pueblo communities (ca. A.D. 950-1300 in this case).

I wanted to see for myself how the shape of the point, things like a concave base or placement of the notches, affected the function of the arrow as a whole.  I've touched on this before but it needs another mention; the subtle differences in how people combine the necessary attributes of a projectile point directly affect the function of the arrow as a whole.  When you are looking at a projectile point, remember that it was only one portion of a complex weapon system that has seen hundreds of different interpretations over the last 1,500 years or so.  An average date of about A.D. 500 is a commonly accepted age for the rise of widespread bow and arrow use in the Southwest.

On to the test! 

Bonito Side Notch compared to scale illust.
I made five arrows: Bonito Notched (ca. A.D. 950-1150), Walnut Canyon (ca. 1150-1300), Pueblo Side Notch Straight Base (ca. A.D. 1150-1400ish) and two different sizes of the PSN Concave Base from the same period as the other Pueblo Side Notched. 

I used wooden shafts with feather fletching.  I shoot a simple recurve bow with a draw weight at about 45 lbs.  Traditional style shooting requires you to face front on a little more than other bow styles and thereby decreases your draw length and associated arrow shaft length.  All of my arrows were cut to my draw length for traditional shooting at 67cm (26.5in).

Frankfurter's Monster


For the Meatbeast I sandwiched about two pounds of sausage between two racks of pork ribs.  The Sausage is there to simulate the organs within the chest cavity.  I'll shoot the arrows from a distance of 15 yards.  Problem #1: I can see that the thick, closely spaced ribs of a pig will pose a problem.  I'm guessing that the spacing and giant size of the ribs will set me back an arrow or two at least.  Either way, it will be cool to see how these things break.  Impact fractures are awesome and amazingly variable so I keep all broken points cataloged with damage type and cause of breakage for a type collection.

Ohhhh, the Results!
Ummm...nope, it came like that
I'll go ahead and get it out there, all five points are no longer with us.  But! that's a shame that occurred after multiple shots on each arrow.  Well, that's a lie, the larger PSN Concave Base glanced off the hay on the first shot, blew a hole through my deck chair and turned to dust on the leg of another.  That was a bit of an annoyance but still plenty cool to watch.  Is this even legal? ...Meh. 
Oh, see there's your problem right there


The smaller PSN straight base did great.  The stubby sharp blade got through the gristle a few times but then broke after a rough shot through bone and sinew.
look at the before picture, it's in all the way to the sinew!!
The smallest point was made on Edwards Chert from here in TX.  This little thing buried itself about half an inch into a rib and decided to stay in there.  I'm still sort of shocked by how deep that point went into the bone.   

Walnut Canyon finally broke after passing though again


Bonito Side Notched with impact fracture on the tip
The Walnut Canyon Side Notched is my personal favorite out of all this.  The point has a deep concavity along the base with the notches placed high along the blade.  This combination seats the point low in the haft and creates barbs due to the deep concavity.  The high notches create more cutting edge on the back end of the arrow.


This approach is great...the deep concavity makes strong barbs without having to corner notch them in and the high notches create a cutting edge that is securely sandwiched between wood, love it. As far as performance goes, this point did great, someday it might even be able to fell a piece of yard furniture.


Lessons Learned:

1) I'm digging the deep concave base and high side notch combo.  I'll try this again to see if my mind is made up.

2) Remove yard furniture because yes an arrow will go through a hay bale

3) Pigs have thick and wide ribs that make things difficult, notice I did not say impossible.

4) Obsidian points will often splinter and send little bits of shrapnel into the material at hand.  This is a good thing as long as it has already created a decent primary wound. 

And the final lineup: I put these in the same order as the image at the top.

COMING UP NEXT ON GETTING TO THE POINT:

Battle of the Barbs: Foreshafts of Doom.


Tuesday, January 22, 2013

Let's Stick Together


Hi all!
It's been a busy beginning of the semester for all of us.  Here's to good luck and perseverance on each of your own adventures.

Here's what we're after
I use pine pitch glue a lot during the course of the week, whether it be hafting a knife, fixing a crack in a water canteen while hiking or attaching stone points to arrows.  But you know what? We've never really gone over how to make the stuff.  It's super easy and a simple batch will last you for dozens of jobs.  This task is yet another economy of scale type of undertaking, where it's really only an advantageous use of your time and resources if you make a decent sized batch, say 8-10 gluesticks.  A single gluestick has lasted me through hafting two knives and five arrow points, the stuff is fantastic.

Look for something like this
Alright, here's the skinny:  I last used resin that I found in nodules on the bark of a Shortleaf Pine, it's one of the Southern US "yellow pines" that grow in thick stands throughout East TX.  In the past I have used Pinion, Juniper, Ponderosa, etc...it would be a safe bet to use any sap you find in clumps on the outside of a tree.  Let me know what tree you used if you give this a go!

Lump charcoal from the store
First, use wood charcoal that has been completely carbonized.  You can find this in a fire pit that has been covered up while still hot.  If setting things on fire in the backyard is a problematic option you can find it in a bag of lump charcoal from the boring store. Crush a heaping palm-sized amount into a fine powder with a stone grinding set up of one fashion or another, doesn't matter.  For those currently thinking coffee grinder...not the best way to keep the significant other happy.  I'm imagining a big ol' soot-drenched smile after a cup of coffee on the way to work and a talking to later that evening.  

Second, crush about 1.5 times as much pine resin as your charcoal.  Some resin will be brittle enough to crunch into smaller bits, other stuff will remain tacky.  This step just makes it all melt faster.


Two nodules ready to go
 Third, Use some sort of binding material, powdered dry grass, powdered cedar bark, pulverized rabbit poop, whatever you get your hands on.  You don't need much, about a third of the volume of charcoal.  This is an important ingredient and serves as a binding agent within the  Matrix

Put this mixture over heat and wait for the resin to start melting down.  Mix the charcoal in well with a stick to get it to a toothpaste consistency.  An alternative way of doing this is to melt the pine resin and add charcoal in bit by bit until you have the desired consistency.


Heat and serve!
Let the concoction cool briefly and keep stirring with your stick to gauge the whole mess you've just created.  As the brew cools it will attach to your stick better; you'll have to work fast at this point and may need to reheat the vessel if it gets too cool.  Scoop up a glob and twirl the stick so it wraps around, wait a second and gently roll on a smooth stone to shape and cool the resin.  I do this a few time per gluestick to get larger amounts on one stick.  Again, you may have to reheat the mixture, but just warm enough to get the glue viscous again, not bubbling.
Roll the mix to cool and shape it

Oh, and a final word.  The stuff likes to burst into flames if it gets too hot.  This happens now and then and is sort of awesome.  If a flaming ball of superheated pine napalm isn't on your goal list I'd suggest heating the stuff in a ceramic bowl over coals, not open flames.  I'm mostly just saying this in hopes that some of you give natures napalm a go.  I have my ideas of who I'll be hearing from soon.

These gluesticks will stay good for years, simply reheat a portion and apply it to your task at hand.  You'll want to wait about ten seconds and then you can shape it with your fingers as it cools down.

Good luck and have fun!


Coming up next I test how different points from the Southwest actually look and work as projectiles.    

Here are a few Pueblo Side Notch points for the next test


Friday, January 11, 2013

The Green Monster de Pachuca

Hey everyone!

The winner of the first giveaway is Lisa Marie Shillito Roberts!!! 

I'll get in touch about your address.

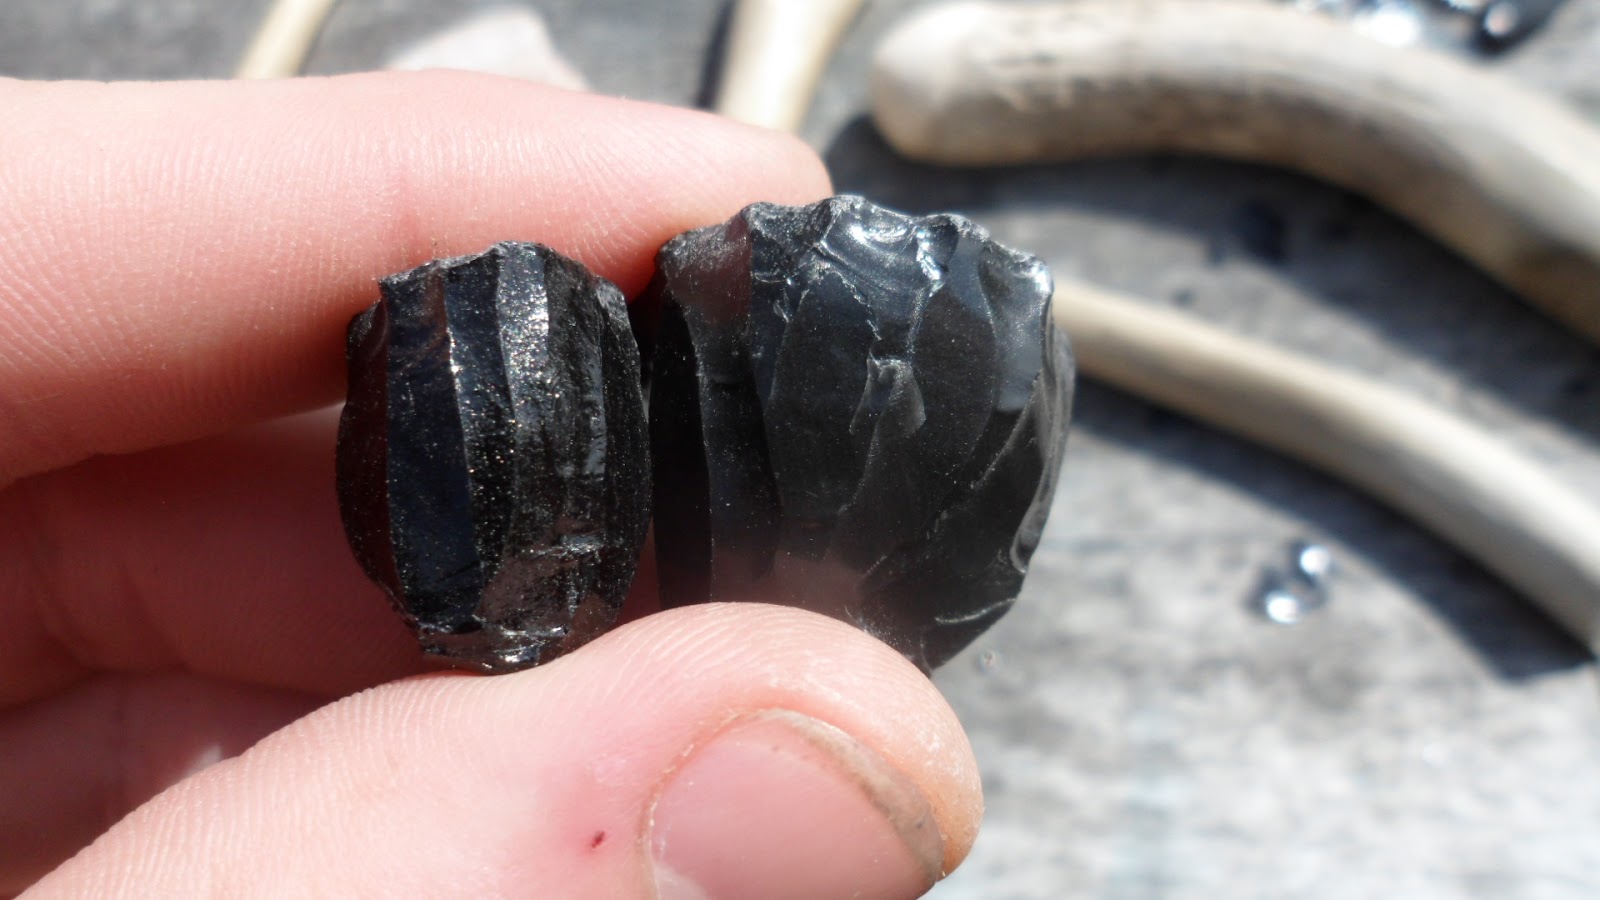
today I had an interview with an obsidian from Pachuca in the central highlands of Mexico!

The monster lives!
Pachuca obsidian has bested me on several fronts over the course of the last few years.  My first run in with this stone ended in several broken points after I bummed some off the other Field Supervisor, Rob Jones, at the Mule Creek Archaeological Fieldschool last year (sorry I busted your stuff).  I also use this obsidian as a geological standard for X-ray florescence analyses at the Center for Chemical Characterization Lab at Texas A&M University.  By tracking relationships within tool source distribution we can target questions about subsistence practice, adaptive strategies during environmental change, social relationships and changing social landscapes over time.

Pachuca on left, Glass Buttes, Oregon on right
Perhaps the attraction comes from the olive green color of the material, or maybe the nuances it holds as a material, probably both.  Simply put, Pachuca obsidian is beautiful and difficult.  I suppose sometimes those two things become complimentary and endearing. Pachuca obsidian is an elegant stone; it forces the use of specific tools, novel approaches and a patient mind.
Central Mexico, southern Idaho, central Oregon


This material seems to step fracture more often than other volcanic glasses, meaning that the slightest pressure against a poorly-created flaking platform will result in a lumpy bifacial blade.  I don't use copper tools for shaping stone anymore and personally like little traits that antler pressure flaking makes.  Antler tines flex with pressure and allows the release of longer flakes with shallower negative flake scars along the blade edge.  Antler tines let the stone bite in a bit as you're building up pressure to detach. Smaller platforms allow thinner, finer flake detachment as there is less mass to move from the onset.  I chose to make longer, thin platforms high upon the working edge.     
Here's the working edge with circles showing different platforms angles, depths and widths

All obsidians have their own personality when it comes to pressure flaking.  Some sources are brittle yet easy to flake and end in blended flake scars.  Others are more plastic and give raised flakes scar margins.  Mixing a more plastic material with the traits of copper pressure flaking will give pronounced flake scar definition and is good when trying to display unique flaking patterns.  Less plastic materials flaked with an antler tine will give smooth, blended shapes that are sleek and utilitarian. 

large flake removal to under-cut a stack on the other edge
Mind the Stacks, Dear

This stuff is a lot of fun to play with once you figure out the best angles.   I crushed a ton of flake  platforms on this pachuca obsidian.  multiple failed attempts to fix this problem create "stacks" on the face of the blade.  These features are often a signal of an incorrect combination of platform strength, removal angle and applied force during flake removal.  Poor flaking quality of a stone will also make this happen a lot.  Still, I create these flaws all the time and have only recently been able to make flakes that can fix the situation.  A stack as a funny thing.  These features on the landscape of a biface are created by repeated attempts to remove the evidence of what was initially a small mistake with improper stabs at a fix.  A stack in the wrong place means that the blade you have created will not integrate  uniformly into the haft and may form a point of weakness along the cutting edge.
Finished project


 Stack on a point from the mid Archaic ca. 4,000 yrs
The lesson of Pachuca obsidian illustrates that unmodified challenges to a steady state create like consequences.  when current flaking strategies fail on this material...logically I need to weigh the benefits of alternative approaches lest I compound the issue.  This glass ended up needing a thin and sharp antler tine for good flex combined with lower platform angles with wider, shallower platform surfaces.   

The stack was approached from both sides but held fast
Creating a stack on a biface always commands an annoyingly haunting level of metaphorical significance.  The tangible features are created as the result of an initial hasty decision.  With an unchanged approach, repetition allows a series of uncalculated flakes to become undeniable.  A self-loathing mind might be troubled by  traces of past mistakes manifested, a red-handed reflection of poor life choices.  I of course have never, not even once felt this way and can barely even describe it decently.                   

But you know what? There's actually an easy fix!  If you create a deep platform on the opposite margin you can undercut the whole mess from the other side with an overshot flake.  So it's not at all doom and gloom by any means.  An assessment of the problem and preparation for a solution will fix it up in no time flat. The blade will haft (yeah made a verb out of that) and your cutting edges will be back to uniform before you know it.  fixing a stack has actually become one of my favorite little things to do while making a biface. 

Thursday, January 3, 2013

Wanna win a spacedagger?

Hey everyone!

I thought it'd be fun to have a giveaway now and then to keep things interactive.  The things will be pretty random, some stuff from practice, fails and wins.  So for the first one I'll be sending out this obsidian knife.  I was practicing different platform strategies and thin overpass flaking.  A few flakes did what I wanted, not all by any means.  I played with end thinning the biface early in the process to embed a little more practice in that arena.  I'll use the knife for an upcoming meat-centric blog post to see how the thing works then send it off the the lucky winner!

Basal thinning flake success
Mid-stage biface for the knife
Send me a name, made up or real, in the comments section for entry into the drawing and my dog Fiki will officiate the selection in an objective manner.  She has recently realized that her fundamental postmodernism has created a feedback loop in her theoretical paradigm and has begun looking into processual-plus.  At least this way you have a chance of obtaining a tangible item rather than a reflection of yourself in it.  It's a realization that she has been struggling with for a little while and frankly it's become something of an issue around the house. 


The obsidian blade is hafted with pine pitch glue and sinew to a polished antler handle.  The thing should be fun to use in the upcoming "Cut and Cook = Steaksplosion " event in the neighborhood.  If you live in the area come by for food fire and friends. 
 
Here's the result of parallel flaking attempt #1, needs a little help

Finished knife


No, you're exactly right, that is the power of the universe that you're seeing


Fiks will be drawing the name one week from now so get your name in the hat!

Turns out that flashlights make obsidian knives look epic.  Wanna win a Spacedagger? send me a name! 

 Cheers and good luck